|
BASICS
I use a glass mat (15 x 12 inch) on which I put the
clay. I put the workpieces on a tile covered in aluminum
foil to prevent it from sticking to the tile. You can
put tile and workpiece together in the oven. For molding
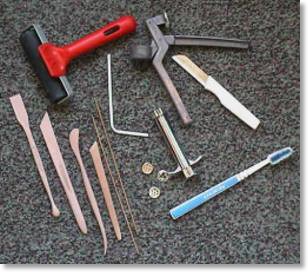
you can use your fingers, peeling-knifes or all sorts
of modeling slices. See picture.
Aluminium foil is used by me to create bigger bodied
workpieces, using clay more efficiently, and as support during
baking
for i.e. arms and heads.
Color wheel:
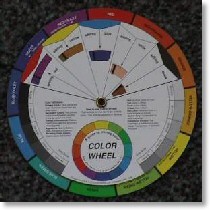
this is handy for determinating the right colour
when mixing clay.
Choose your colours and look at the result.
Color index:
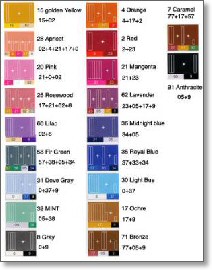
Fimo has a handy index how
much clay to use to obtain the right colour. You can
find this index on information hand-outs of Fimo.
|
|
MAT
I use a glass mat but a smooth surface (a
table) is fine too.
The workpieces are all baked in a ordinary kitchen
oven using a tile, covered in aluminium foil to prevent
the workpiece from sticking to the tile.
BRAYER
Use a brayer to smoothen and flatten the
clay you are working with. If it is large, this can
be used as a bottom or a foundation for your workpiece,
if it is small you can use it for flower petals.
 CLAY EXTRUSION GUN CLAY EXTRUSION GUN
You can use this "gun"
to make flowers, petals and grass (see the picture on
top of this page). You can of course use your garlic
press, but it will be hard to clean it again.
MODELING TOOLS
Drills, blades and tools are used
to shape the clay, deepen grooves, shape cuticles, sculpt
wrinkles, drill holes and add the artists (your) initials
to your workpiece. Look at the picture on top of this
page. Also very useful are: kitchen knife, toothbrush,
pricker or a match.
SHADE-TEX
These molds enable you to create quickly
the preferred textures or patterns in your clay (possibilities
i.e. nature or architecture). They look like pieces
of paper, are flexible and transparent and can be used
both sides. First you have to put some talcum powder
on it, so it will not stick to your workpiece. Then
push it on that part of your workpiece you want to decorate
(then, wash the mold).
|
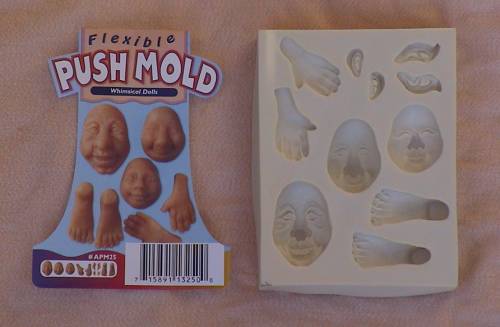
PUSH MOLDS
Amaco, Polyform and Make Me sell molds
for making roses, plants, shoes, Paddington, people
and bear faces...
Polyform now sells flexible
molds. These are very handy. Roll a
clay ball the size of the impression you
are going to make. Press it completely into
the mold. Remove excess clay that does not
fit in the mold. Clay should be flush with
top of the mold. Place the mold, with
the clay in it, inside the freezing compartment
of your refrigerator for about 90 seconds.
Remove and "pop" your creation
out of the mold like an ice cube (press
the opposite side of the mold). Now you
can customize it, add more details or remove
and add parts as desired.
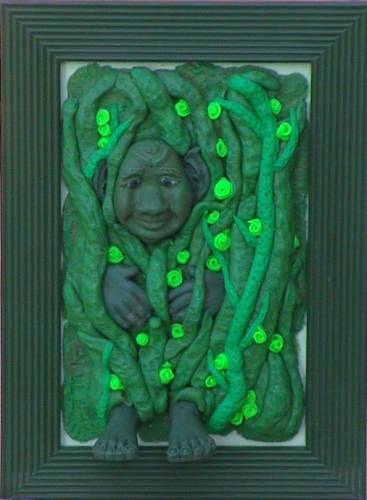 
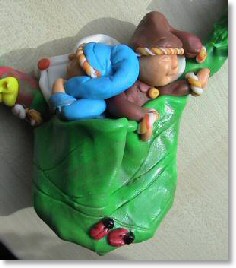
The head, hands and feet
of this creation, "hide & seek"
was made using a Polyform push mold.
Hide
& Seek
|
FIMO METALLIC
POWDERS
These brilliant and shiny powders can be applied onto objects with
a brush before baking or applied with Fimo Lacquer after cooling to add a touch
of sparkle to your creations.
MAGIC FOIL LEAF and PEARL EX POWDER
You can use
the foil to add gold or other exotic colours to your
workpiece. The powder has to be brushed on (sparingly)
for a mother-of-pearl effect.
|